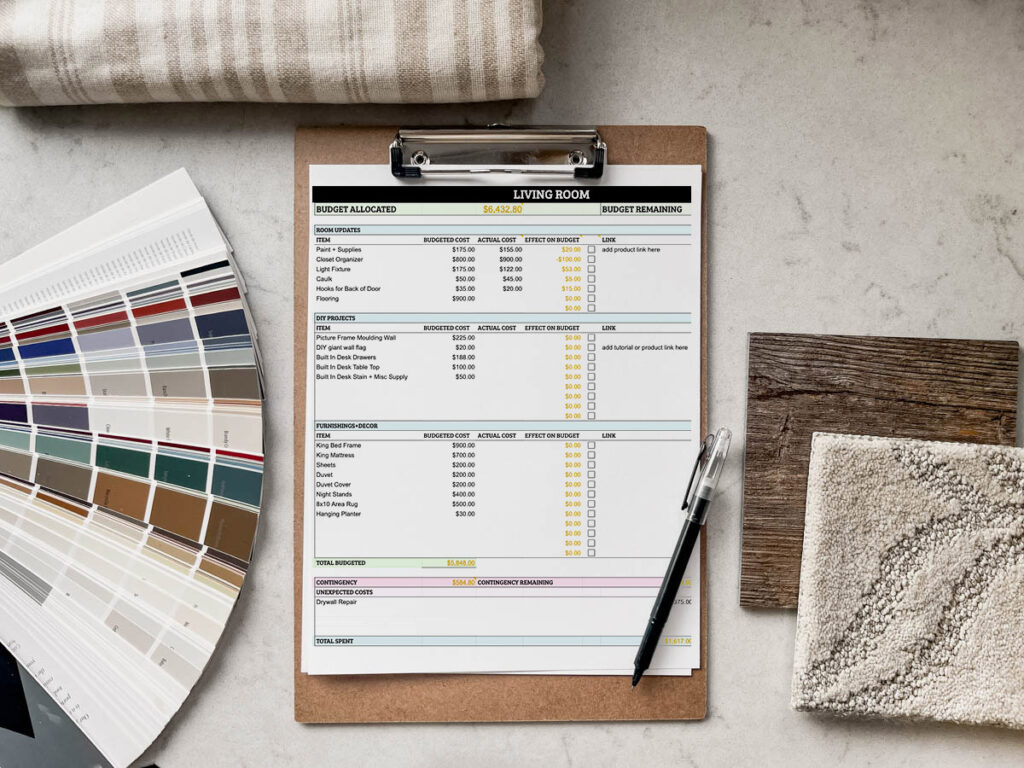
Most DIY projects don’t go over budget because the labour’s expensive. They go over budget because people don’t plan their trade building supplies upfront, so they buy the wrong stuff, buy it twice, or start a job before they’ve got the materials that actually make it work.
If that sounds familiar, you’re not alone. Renovations are full of “small” purchases that quietly add up: the right primer for the surface, the correct fixings for the wall type, the sealant that stops the edges lifting, the adhesive that actually holds.
This post is a simple, realistic renovation plan you can follow for any room. It’s built around buying in stages, working in the right order, and avoiding the hidden costs that catch people out.
Step 1: Define the room goal (cosmetic refresh vs functional upgrade)
Before you buy anything, you need to be clear on what you’re trying to achieve. Because the checklist changes depending on whether you’re refreshing the look or upgrading how the room works.
Option A: Cosmetic refresh
This is paint, flooring, new lighting, maybe updated handles or trim. It’s mostly surface-level improvements.
Typical scope:
- Paint walls/ceiling/woodwork
- Replace flooring (laminate/LVT/carpet)
- Replace light fittings/switches
- Minor repairs (fill cracks, re-caulk edges)
Option B: Functional upgrade
This is when you start moving plumbing, changing layouts, upgrading storage, replacing units, or improving ventilation and electrics.
Typical scope:
- New kitchen units/worktops
- New bathroom suite or shower
- Updated sockets/lighting plan
- New extractor fan/venting
- Replastering, levelling, boarding
The money-saving point: functional upgrades have “dependency materials” — things you can’t see, but must buy (pipe fittings, backer boards, membranes, fixings). If you only budget for the visible stuff, you’ll overspend halfway through.
Step 2: Measure properly (and calculate wastage percentages)
Most overspending happens because people guess quantities — then panic-buy when they run out mid-job.
What to measure
- Wall width x height (minus doors/windows)
- Floor length x width
- Skirting and architrave lengths
- Ceiling area (for paint or boarding)
- Tiling area (include splash zones and full height)
Wastage percentages (use these as a rule of thumb)
Different materials need different buffers. If you buy exactly what you need, you’ll nearly always come up short.
- Paint: +10% (or +15% for porous walls/new plaster)
- Flooring planks/tiles: +10% (up to +15% for herringbone patterns)
- Wall tiles: +10% (15% if lots of cuts/angles)
- Wallpaper: +1 extra roll minimum (patterns waste more)
- Plaster/compound/filler: +10% (easy to underestimate)
Things nobody tells you: the small items have wastage too. Silicone, caulk, rollers, sanding sheets — once you’re halfway through, you’ll go through them faster than you expect.
Step 3: Make a “sequence list” so you do jobs in the right order
This is the step that saves you the most money, because it prevents rework.
A good DIY renovation sequence looks like this:
- Clear + protect (remove furniture, cover floors)
- Demolition / strip-out (remove old fittings, old flooring)
- First fix (plumbing/electrics/venting changes)
- Surface prep (repair, sand, fill, prime)
- Wet trades (plastering, levelling compound, waterproofing)
- Paint ceilings + walls (mist coat first if needed)
- Floors (fit flooring, then skirting/thresholds)
- Second fix (lights, switches, taps, accessories)
- Seal, caulk, touch-up
- Final clean + snag list
Hidden cost moment: people often fit new floors too early. Then they scratch them while decorating, or spill filler/paint and end up buying more flooring supplies than planned.
Step 4: The room-by-room materials checklist
Below is a buying checklist by room, written to reflect what you’ll actually need — including the boring stuff that stops the finish failing later.
Kitchen: materials checklist (refresh or upgrade)
Core materials
- Wall & ceiling paint (kitchen-safe, wipeable)
- Primer (especially if painting cabinets or stained walls)
- Roller set + angled brushes
- Masking tape + caulk
If fitting new units or making changes
- Fixings appropriate to wall type (plasterboard plugs / masonry anchors)
- Cabinet screws + brackets
- Worktop installation kit (joins, bolts, sealant)
- Silicone sealant (sanitary grade for sink edges)
- Adhesive (for upstands/splashbacks if not tiled)
Splashback options
- Tiles + tile adhesive + grout + spacers
- Or panel splashback + grab adhesive
The “nobody tells you” extras
- Pipe collars, isolation valves, and compression fittings (even for small changes)
- Heat-resistant paint behind hobs (if needed)
- Dust sheets + plastic protection film (kitchen dust spreads everywhere)
Bathroom: materials checklist (where budgets disappear fastest)
Bathrooms are where DIYers overspend the most, because water-proofing and prep are non-negotiable.
Core materials
- Anti-mould bathroom paint
- Primer (for glossy surfaces and patches)
- Caulk, silicone (sanitary mould-resistant)
- Scrapers, sanding pads, cleaning solution (degreaser)
If tiling
- Tiles + 10–15% wastage
- Tile adhesive (check wall type: plasterboard/backer board)
- Grout (correct type for wet areas)
- Spacers + tile levelling system (optional but helpful)
- Tile trim edging (easy to forget)
- Waterproofing kit (tank membrane + tape) for shower zones
If fitting fixtures
- Basin/toilet fixings
- PTFE tape + flexible hoses
- Waste traps, pipe fittings, seals
- Wall plugs suited to tile/masonry
- Shower screen fittings
The “prep saves money” items
- Backer boards (for showers if walls aren’t suitable)
- Sealant remover + reapplication tools
- Extractor fan kit (many bathrooms need better ventilation than you think)
Skipping waterproof prep is one of those choices that looks like savings today and becomes expensive later.
Hallway: materials checklist (high traffic, high wear)
Hallways look simple, but they take a battering — shoes, bags, bikes, prams, pets.
Core materials
- Durable paint (scrubbable / scuff resistant)
- Primer for stained patches
- Filler for dents + sanding blocks
- Woodwork paint (skirting and door frames)
Flooring
- LVT/laminate/carpet + underlay (if required)
- Threshold strips / transition bars
- Adhesive or underlay tape
Finishing
- New skirting (optional) + grab adhesive + pins
- Door stops (tiny cost, big prevention)
- Coat hooks / rail fixings
Often forgotten
- Corner protectors or extra coats around high-contact areas
- Adhesive remover (old carpet glue is a time thief)
Bedroom: materials checklist (comfort + clean finish)
Bedrooms are usually easier wins — but only if you prep properly.
Core materials
- Wall & ceiling paint
- Primer / stain blocker (if there are marks or nicotine staining)
- Fine filler for cracks
- Sanding sheets + dust mask
Optional upgrades
- Feature wall wallpaper + paste + smoother
- New light fittings + bulbs
- New sockets/switch plates (if refreshing)
Flooring
- Carpet + underlay + grippers (if fitting)
- Or laminate/LVT + underlay + beading
Common overspend trigger
People forget they’ll need new rollers, clean brushes, and more filler than expected once they start sanding back and notice every tiny defect.
What most people forget (the “quiet budget killers” list)
These aren’t exciting, but skipping them is exactly how projects end up costing more.
- Adhesives (grab adhesive, flooring adhesive, tile adhesive)
- Fixings (wall plugs, screws, brackets, anchors)
- Sealants (decorators caulk, sanitary silicone)
- Primer (multi-surface, stain block, bonding primer)
- Dust sheets + plastic sheeting
- Sandpaper in multiple grades
- Mixing buckets + paddle attachments
- Spacers, trims, corner bead
- Cleaning supplies (sugar soap/degreaser)
- PPE (gloves, masks, goggles)
These are the trade building supplies that stop you wasting money later, because they prevent peeling paint, lifting trims, cracking grout, and wobbly fittings.
When to hire a pro vs when DIY makes sense
DIY is brilliant for saving money, but only when the job is predictable and safe.
DIY makes sense when:
- Painting, filling, sanding
- Replacing handles, lights (like-for-like, safe work only)
- Laying click flooring in a simple layout
- Basic tiling on straightforward walls
- Re-caulking and resealing
Hire a pro when:
- Plumbing changes affect mains water or waste runs
- Electrics involve new circuits, consumer units, or safety-critical work
- Structural walls, lintels, load-bearing changes
- Wet room waterproofing if you’re uncertain
- Full plastering jobs if you need a perfectly flat finish
The cost logic: paying for one pro day can be cheaper than undoing a job that fails and buying the materials twice.
A simple way to buy without overspending
If you want a quick rule that works:
Buy in stages, not all at once.
- Prep + protection supplies
- Repair + primer materials
- Core “visible finish” items (paint, tiles, flooring)
- Fixings + sealants + finishing touches
That keeps your spend controlled and stops the “panic purchase” situation.
Final thought
Renovations feel expensive when you’re improvising. But when you measure properly, sequence the work, and buy materials in the right stages, everything becomes calmer, and a lot less wasteful.
If you get your trade building supplies in the right order, the job runs smoother, the finish lasts longer, and you stop spending money fixing problems that didn’t need to happen in the first place.
Stay in touch to get more updates & news on The Ranest!